
Guide
Installing a balcony power plant: how to do it safely
You can set up most balcony power plants yourself – provided the mount, fixings and connection are right. This guide takes you through planning, installation and commissioning.
Updated 7 min readEditorial team wosolar.de
Planning: location, space and load capacity
Before ordering panels, measure the mounting location carefully. A typical 400 to 500 Wp panel is around 1.7 to 1.95 metres long and about 1.13 metres wide. Check whether two panels fit side by side on the railing or whether you'll need to mount them in portrait orientation. Note the height, thickness and profile of the handrail (round or square) – the right mount depends on it.
Also clarify the load capacity. Glass-glass panels often weigh over 20 kilograms each; add to that the mount and, in a storm, considerable wind forces. With lightweight railings, glass balustrades or an unclear building structure, lighter flexible panels or setting them up on the balcony floor are the safer choice. In rented flats and owners' associations, agree on the type of mounting and appearance beforehand – consent is required, but you're generally entitled to it.
Choosing the right mount
There are four basic types, differing by mounting location. In every case, make sure the mount is designed for the panel width, panel weight and wind load:
- Railing mount: hooks or clamping profiles hang the panel vertically or at a slight tilt on the handrail.
- Mounting frame: adjustable triangular frames for balcony floors, flat roofs, garages or gardens – usually adjustable from 0 to 90 degrees.
- Wall mount: for façades, garden sheds or fences; fixings must suit the surface.
- Ballast systems: trays or frames with weights, so no drilling is needed on flat roofs.
Mounts compared
Ad All products linked with "View offer" are commission (affiliate) links: if you buy through them, we earn a commission – the price stays the same for you. As an Amazon Associate and eBay Partner Network affiliate we earn from qualifying purchases. Learn more
 Ad−8%
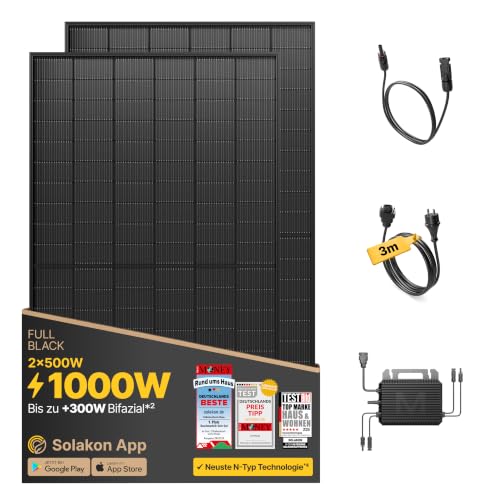
Ad−8%Solakon® 1000W Balkonkraftwerk komplett Steckdose, Ohne Halterung, 3m Kabel
 Ad
AdSolakon® 1000W Balkonkraftwerk komplett Steckdose, Ohne Halterung, 5m Kabel
 Ad
AdBalkonkraftwerk 1840W, WIFI, drosselbar …
 Ad
AdWohnmobil Set 100W 200W 300W 400W Solarmodul Solarpanel Mit Montage PV …
Orientation and tilt
In Germany, you achieve the highest annual yield with a south-facing orientation and a tilt of around 30 to 35 degrees. That's rarely fully achievable on a balcony, but even a slight tilt instead of strictly vertical mounting helps noticeably in the summer half of the year. In winter, when the sun is low, vertical panels perform comparatively well.
An east-west split is a good alternative if you have two surfaces: one panel delivers in the morning, the other in the afternoon. This spreads generation across the day and increases self-consumption. You'll then need an inverter with separate inputs for each panel. Avoid shading as far as possible – even a balcony post or window box casting a shadow in the morning costs yield.
Installation step by step
The exact order is set out in your kit's instructions. The typical process looks like this:
- Pre-assemble the mount on the railing or frame as instructed, tightening all screws to the specified torque.
- Lift the panels with two people and fix them only in the clamping areas approved by the manufacturer.
- Mount the inverter in a protected spot – usually behind the panel or on the mount, not in blazing sun and not in puddles.
- Connect the panel cables (MC4) to the inverter until the plugs audibly click into place; secure the cables with UV-resistant ties.
- Route the AC cable to the socket without trapping it in window or door rebates.
- Only plug into the socket at the very end.
Tools and materials
Simple tools are enough for most kits. Have these ready beforehand:
- Tape measure and spirit level for alignment and spacing
- Suitable spanners or bits for the mount, ideally a torque wrench
- UV-resistant cable ties or cable clips
- Work gloves with good grip for carrying the panels
- A second person – panels are bulky and heavy, especially on a balcony
Special case: gardens and flat roofs
In the garden and on flat roofs, panels stand free and are more exposed to wind than on a railing. Mounting frames must therefore be weighed down with sufficient ballast or anchored in the ground. How much weight is needed depends on the tilt angle, panel size and location – follow the mount manufacturer's specifications. On garage or flat roofs, check in advance that the structure can bear the extra load and that the roof waterproofing stays intact.
For longer cable runs from the garden to the house, cables should be routed in protective conduit so they aren't damaged by lawnmowers or animals. Feed-in works the same as on a balcony: directly into a permanently installed socket suitable for outdoor use.
Care and inspection
Rain usually cleans panels well enough. Remove heavy soiling from bird droppings, pollen or leaves with water and a soft sponge – no pressure washers and no harsh cleaning agents. Once a year and after storms, check screws, clamps and cables for damage. A sudden drop in yield in the app is often the first sign of a problem.
When to call in a professional
You can mount the panels and plug in a plug-and-play kit yourself. Some jobs, however, belong in the hands of a qualified electrician: fitting a new outdoor or feed-in socket, installing an energy plug-in connector for systems above 960 Wp, changes to the circuit or fusing, and inspecting an old electrical installation. Also, if fuses trip when feeding in, sockets get warm or you smell burning, disconnect the system from the grid immediately and have the cause investigated.
Professional help is also worthwhile when mounting at great height, on façades or on steep roofs – not because of the electrics, but because of the risk of falling. A specialist firm can also tell you whether the wall and railing can safely bear the load.
Many retailers now offer kits including installation. That costs more, but saves time and gives you a point of contact if something isn't right later. In this case, compare carefully which services are included – such as call-out, feed-in socket, packaging disposal and an introduction to the app. Either way, registering in the Market Master Data Register remains your responsibility as the operator.
Connection and safety
Plug the balcony power plant directly into a permanently installed socket, not a multi-socket adapter or cable reel. According to the product standard DIN VDE V 0126-95, a Schuko connection is intended for plug-in solar devices up to 960 Wp of panel output without a battery, above that a dedicated energy plug-in connector. Outdoor sockets should be suitable for outdoor use. If you're unsure whether the circuit and fusing are in order, have them checked by a qualified electrician.
When dismantling, follow the reverse order: unplug first, then disconnect the panel connections. Panels generate voltage as soon as light falls on them – never work on the DC connectors under load. Check the fixings and cables after severe storms and at least once a year.
Commissioning and registration
After plugging in, the inverter synchronises with the grid and starts feeding in after a short time. Set up the app, if there is one, and check that the output is limited to 800 watts. Then register the system in the Market Master Data Register – usually within one month of commissioning. Note down the panel output, inverter output and date for this.
In the first few days, it's worth keeping an eye on generation: if it differs greatly from what you'd expect given the weather, check the plug connections, shading and settings. A metering plug or the inverter app shows you how much electricity is actually being delivered.
Large kits up to 2,000 Wp for gardens and flat roofs
Ad All products linked with "View offer" are commission (affiliate) links: if you buy through them, we earn a commission – the price stays the same for you. As an Amazon Associate and eBay Partner Network affiliate we earn from qualifying purchases. Learn more
 Ad−15%
 Ad
AdBalkonkraftwerk 2000W , Wechselrichter mit WIFI, APP, 12 Jahre Garantie
 Ad
Ad1840 Watt Balkonkraftwerk - 2000W Wechselrichter, WIFI, APP …
 Ad
Ad2000W Balkonkraftwerk. 12 Jahre Garantie. APP, WIFI, Schukokabel GRATIS.
FAQ
Can I install a balcony power plant myself?
Yes, plug-and-play kits are designed for self-installation. However, installing a feed-in socket or working on the fixed electrical installation belongs in the hands of a qualified electrician.
How do I fix panels securely to a balcony railing?
With a mount that matches the profile and thickness of the handrail and is designed for the panel weight and wind load. Tighten all screws as instructed and check them regularly.
In what order do I connect everything?
First connect the panels and inverter, then plug into the mains last. When dismantling, unplug from the mains first.
Can the panel stick out beyond the railing?
You should avoid this, especially above footpaths or neighbouring balconies. Landlords or owners' associations may also set rules on mounting.